
Enabling SR-IOV for VMware
Enabling SR-IOV for VMware
Enable SR-IOV on a Physical Adapter
Use the following steps to enable SRX-IOV on a physical adapter. The following procedures are applicable for ESXi version 6.5 or newer versions.
To enable SR-IOV on a physical adapter in vSphere client:
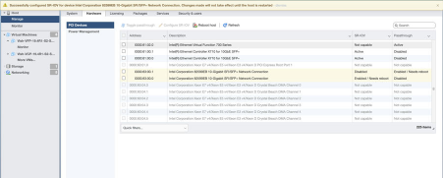
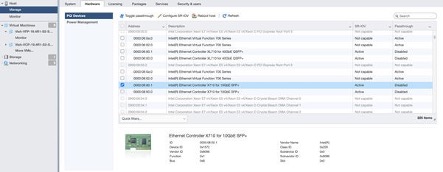
Navigate to the host in the left navigation pane and click the Manage tab. Go to Hardware tab. Under PCI Devices option, select the physical adapter and click Configure SR-IOV option.
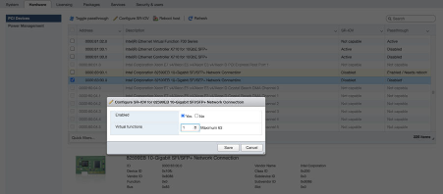
In the populated window, select Yes to enable SR-IOV. In the virtual functions text box, specify the number of virtual functions to configure for the adapter.
Click Save.
Restart the host.
Verify the status of SR-IOV post reboot. The status is displayed as Active.
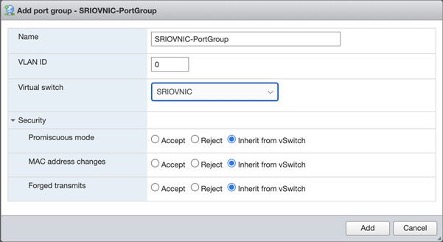
Add vSwitch and Port Groups
Use the following steps to enable SRX-IOV on a physical adapter if you are using ESXi version 6.5:
To add vSwitch and Port Groups:
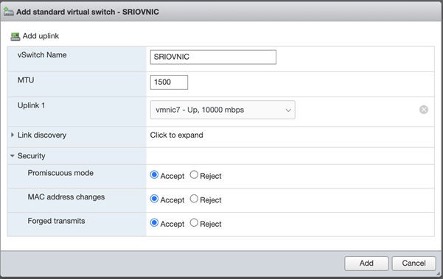
To create vSwitch: Navigate to Networking tab and select Virtual Switches and click Add standard virtual switch.
To create port groups: Navigate to Networking tab and select Port Groups and click Add port group.
Assigning the SR-IOV NIC to the VM
Use the following steps to enable SRX-IOV on a physical adapter if you are using ESXi version 6.5:
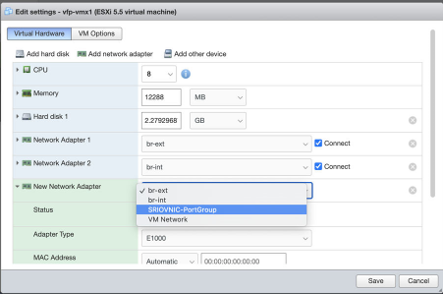
To assign the SR-IOV to the VFP VM using the vSphere Web Client:
Power-off the VFP when you add SR-IOV to the VM.
Navigate to the VFP VM in the left navigation pane and click the Manage tab.
Select VM Hardware, and click Edit near the top right corner.
In the Edit setting, go to Virtual Hardware tab and click Add network adapter option.
Under New Network Adapter, select the respective port group for mapping.
Change Adapter Type as SR-IOV passthrough.
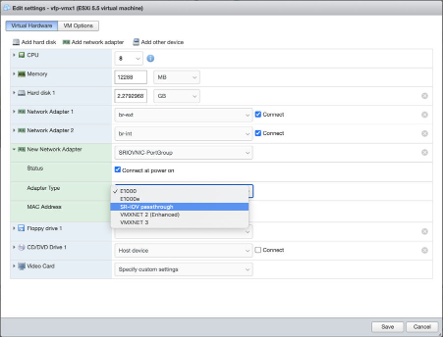
Map Physical function to respective SR-IOV NIC.
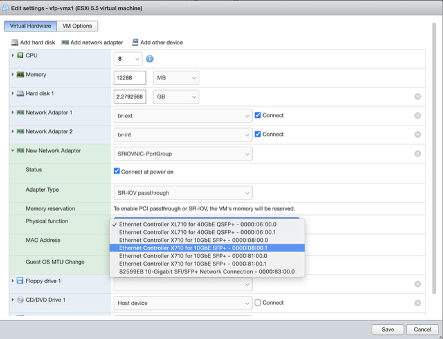
Click Save.
Now, the SR-IOV interface is added to the VM.