
OpenEdge RS400 - Quick Start Guide
1 RS400
The RS400 system is a high-performance Wi-Fi 6 AX6000 router designed to provide robust networking solutions for enterprise environments. This quick start guide will assist you in setting up your RS400 system and accessing its web-based administration panel for configuration and management.
The Primary components of the RS400 system are:
RS400 appliance
12V/4A DC Power Adapter
Ethernet Cable
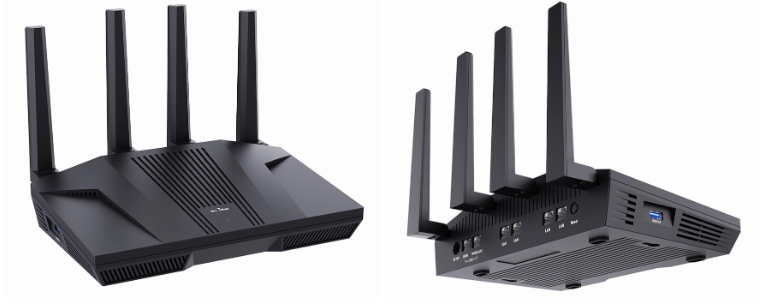
Figure 1 RS400 system Front View and Back View
1.1 Hardware Overview
Front Panel:
One USB 3.0 port
Reset button
Rear Panel:
Two 2.5G Ethernet ports (configurable as WAN or LAN)
Four 1G Ethernet LAN ports
DC power input (12V/4A)
1.2 Steps to bring the system online
1.2.1 Powering On
Connect the DC power adapter to the RS400 and plug it into a power outlet. Use a UPS for site deployments with unstable power.
Wait for the router to boot up; the LED indicator will turn solid white when ready.
1.2.2 Connecting to the Router
Option 1: Wired Connection
Connect your laptop’s Ethernet port to one of the LAN ports on the RS400 using the provided Ethernet cable.
Ensure your computer is set to obtain an IP address automatically (DHCP).
Option 2: Wireless Connection
On your device, search for available Wi-Fi networks and connect to the SSID named "RS400-XXXX" (the "XXXX" represents the last four characters of the router's MAC address).
The default Wi-Fi password is printed on the bottom label of the router.
1.2.3 Accessing the Web Admin Panel
Open a web browser (Chrome, Edge, Safari, etc.) and enter
http://10.0.254.1in the address bar.You will be directed to the initial setup page of the web Admin Panel.
1.3 Initial Configuration
1.3.1 Language Selection
Choose your preferred language and click "Next" to continue.
1.3.2 Set Admin Password
Create a strong admin password for the router's web interface.
Confirm the password and click "Next."
1.3.3 Configure Internet Connection
Select the appropriate internet connection type:
Ethernet: Connect the WAN port to your modem or existing network.
Repeater: Connect to an existing wireless network.
Tethering: Use a smartphone's USB tethering feature.
Cellular: Connect via a USB 3G/4G modem.
Follow the on-screen instructions to complete the setup for your chosen connection type.
1.4 Accessing the Internet
After completing the initial configuration, your RS400 should be connected to the internet.
You can now connect your devices to the router via Ethernet or Wi-Fi to access the internet.
1.5 Additional Features
The GL-MT6000 supports advanced features such as VPN setup, guest networks, and more.
For detailed instructions on utilizing these features, refer to the user manual available at GL.iNet's official documentation.
1.7 Troubleshooting
If you encounter issues accessing the web Admin Panel, ensure your device is properly connected to the router and set to obtain an IP address automatically.