
Wireguard
Wireguard VPN Server Settings
To do Wireguard VPN Server settings, perform the following steps.
Steps
The Wireguard tab is selected by default.
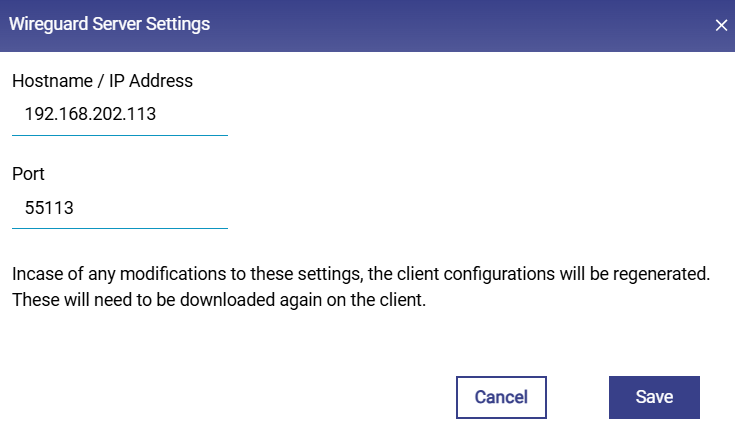
Click Pencil icon next to Wireguard Server. Pop-up as seen Figure Wireguard VPN Server Settings in appears.
· Enter the IP Address or the Hostname of the Server.
· Enter the Port for the VPN server.
· Click Save.
Wireguard
Wireguard VPN Server Settings
Adding a new Wireguard VPN Client
To add a new Wireguard VPN client, perform the following steps.
Steps
· If a Client Configuration were built, the user will see a list of Wireguard VPN client profiles under the Wireguard Server table.
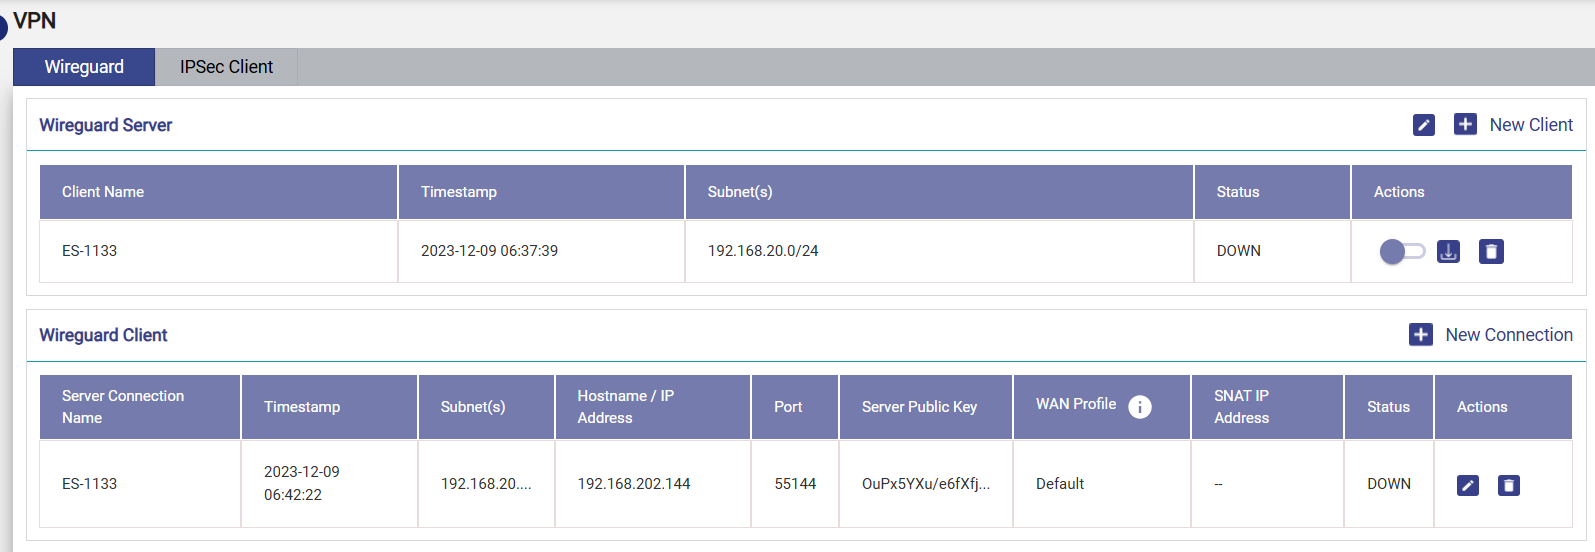
· Click + New Client button on the top right, see Figure Wireguard VPN Server. Add New Client Pop-up appears, see Figure Add New Client Pop-up.
· Enter Client Alias Name, i.e., a name for the new client.
· Enter the Subnet(s) for the new client. The user can enter one or more subnets, which are comma separated but without spaces. Onboard networks should be used for this purpose.
· Click Save.
· The client details appear in the table listing the currently configured clients, see Figure Wireguard VPN Server with each row having details of the Client Name, Creation Timestamp, Subnet(s), and Status.
· The user can click on Download icon to download the Connection File of each client.
· The user can click on to Delete icon delete client.
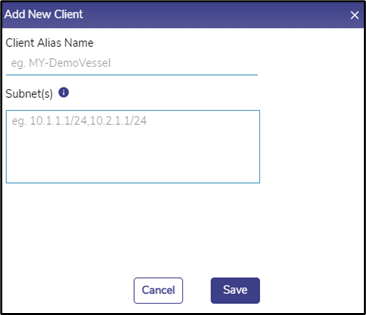
Add New Client Pop-up
Adding a new Wireguard VPN Connection
To add New Connection, perform the following steps.
Steps
· Click + New Connection button on the top right of the Wireguard Client table, see Figure Wireguard VPN Client Section.
· The Add New Connection Pop-up appears. see Figure Add New Connection.
· Enter the Wireguard Server Alias Name, i.e., a client connection name.
· Select a WAN Profile to apply this connection to. Note that the selected WAN profile should not have any bonded set.
· Click the Upload Configuration folder icon to upload the Connection File obtained
from the server.
· Click Save.
· The configured client connection details appear in the table listing the currently configured client connection table, see Wireguard Client Section with each row having details of the Server Connection Name, Creation Timestamp, Subnet(s), Hostname/IP Address, Port, Server Public Key, WAN Profile and Status.
· The user can click on Pencil icon to edit the client connection. Only Connection Name and WAN Profile are editable, see Figure Edit Client Connection. Click on Green tick icon to save the changes or X icon to discard them.
· The user can click on Delete icon to delete client connection.
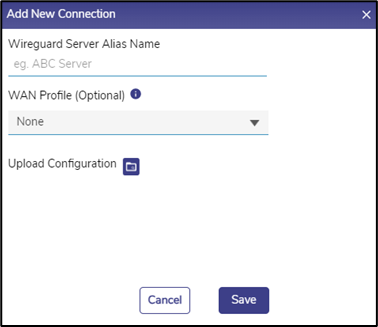
Add New Connection

Edit Client Connection